April 21, 2008
Screen Capture for Windows CE H/PC
 A tool created out of necessity. I was trying to create a screen shot or screen capture for the next post and had a bad color issue, where some greys turned into purple and pink somehow. Tried another one I could find online and it put extra data info into the palette range, which severely impacted coloring. Rather than spend more time in the web search and trial and error to find one for this increasingly de-popularized platform for free, I thought it might be worth it to write one on my own.
The first steps towards that effort were fruitful and took a very short time. I was using a PC development and testing environment, but when I put it through the Windows CE compiler I came across unsupported API. Then I did it a different way, but still when I hit the Windows CE compiler I had some bad links for unsupported API. Who is to say they make this stuff easy?
After hacking through all I could think to do, I was able to get a functional program that I could test successfully in 16bit and 32bit on the desktop PC under XP and in 8bit on Windows CE 2.11 and Windows CE 3.0 (HPC Pro and HPC 20000 versions).
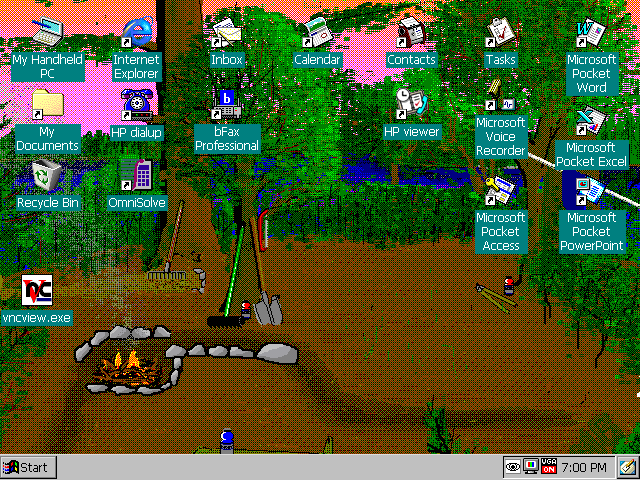
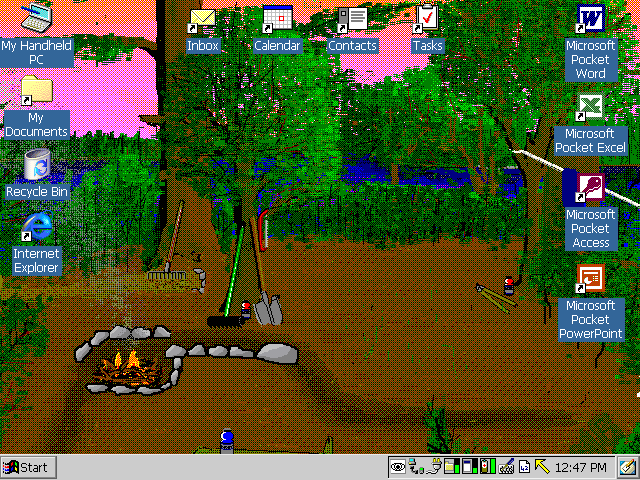
After the link you can see a couple screenshots taken with the program and further instructions for use.
In all these versions, there is no window to speak of, in the traditional sense (saved a lot of code and feature creep by doing it that way). The UI consists of an item that sits in the task tray next to the clock on your system. It looks like an eye inside a window, or as close to one that is reasonable given my not existing icon making skill. The working directory is the directory that you have installed the program in. That's where the captures go, so you may want to ensure a lot of storage since bitmaps get big (640x480 screen @ 8 bits per pixel makes 300 kilobyte files).
Since I prefer to use storage cards to hold as much data and programs as possible due to the general limits of on device storage in theproduct tier. I locate the program in 'Storage Card' and 'Storage Card2' on my Windows CE devices. Usually I map the storage cards to look like a main drive by using the heuristics Microsoft had given to us. Basically, I make a "My Documents" and a "Program Files". In "Program Files", I create a folder for the program and locate it there. Unfortunately, it was easier to use executable directory for outputting the capture than to check if a "My Documents" folder exists. I copy them there through activesync or directly onto the storage card with a card reader depending on what is on hand and near me. Enough about me, let's take a look at the installation and usage intstructions so you can make screen shots like the following:
Jornada 820

PenCentra 200 w/ HPC2000

Note the eye icon in the system tray window, near the clock in the lower right.
Installation Instruction
Go to the download page for downloading the zip archive package for the platform you want to use. I broke the delivery packages into a PC platform, which was tested on Windows XP using 32bit and 16bit(256 colors) color depths. The others for HPC 2000 and HPC Pro are all bundled together. This leaves you some work in finding the appropriate executable to load to your device and which method you want to go about doing that. Later, when I have some spare time I may go back and make an installer with CAB files and such, but it looked a bit more complex than I was hoping for and I can only reasonably test one configuration since my Active Sync does not work on my Jornada.
To find your H/PC version, you can go to the System control panel applet (Start -> Settings -> Control Panel -> System) and choose the "System" tab. My Windows CE 2.11 device says "Microsoft Windows CE, Handheld PC Edition Version 3.0" and I refer to that as "HPCPRO". My Windows CE HPC 2000 says "Microsoft Windows for Handheld PC 2000" and I refer to that as "HPC2000". Note that down.
Now that you're in the general area, you will want to find the CPU type. This is in the same spot, but rather than the "System" tab it is on the "Device" tab. The info after "Processor Type" is what you want to note down. My devices are a StrongARM and a MIPS. Note yours down near where you noted the Operating System version.
Next step is to unpack the zip file you downloaded to where you will remember how to access it. The contents for the Windows CE zip file is broken into this heirarchy:
<Operating System>\<CPU>\<Executable>
Where the Operating System you noted above, the CPU you noted above, and the executable being ScrnGrab.exe. Using your storage card, IR, Serial Link, FTP, Active Sync, File Explorer, etc, you will want to copy the executable you found to where it makes sense for you to run the program from and where the screen captures will be stored. Mine was in \Storage Card\Program Files\ScrnGrab\ScrnGrab.exe.
Optionally, you could create a start menu item or desktop item by right clicking and choosing copy on the executable and then navigating to "\Windows\Programs" and choosing to Paste A Shortcut to appear on the "Start Menu". If you needed it on the desktop, then you can do the same thing in "\Windows\Desktop". Windows PC steps are similar, a web search will be able to give you massive quantities of tutorials for that.
Operating Usage Instruction
On the device, double click to launch the program. Nothing will pop up on your main screen area due to the program consisting of only a Tray Icon user interface. To interact with it, locate the icon you see in the beginning of this post in your Tray Window near the system clock. In Windows XP you can right click on it to get to the menu. In Windows CE you will have to double click to see the menu.
This menu has three items: Capture, About, Exit.
Capture
Selecting this item will begin the screen capture process. It will capture the whole screen and leave it in bitmap format expecting you to bring it to a screen editor at a later time for post processing such as cropping and compressing to GIF or PNG where needed. This bitmap will be written in the same directory as where the executable was launched from and will carry your local data and time as the filename along these lines as I type this: 20080420_114222_000.bmp. Year, Month, Day, Hour, Minute, Second, Milliseconds, and lastly the '.bmp' extension. When the operation completes you will hear and audible beep and the file will be created.
About
Selecting this will show a window with the information about this program, such as the name and version with a clickable link back to this website.
Exit
This exits the program, since there is no other UI available to close the program.